Minggu, 08 Juni 2014

LUKAS PODOLSKI

"Prince Poldi" or "Prince of Köln" are just two of several nicknames for Lukas Podolski in Germany. He is a star from Poland who has already played more than 100 games and scored 44 goals for the German national team.

Childhood
Lukas PodolskiLukas Josef Podolski was born on June 4th, 1985 in Gliwice, Poland. He is the son of former professional soccer player Waldemar Podolski and Krystyna Podolska. His sister Justyna is 5 years older than him.
Podolski's family moved to Germany in 1987. This is the reason he has both German and Polish citizenship.
Podolski started his soccer career in 1991, playing for FC Bergheim before FC Köln signed him in 1995.
 

FC köln

Lukas Podolski played his first game as a senior on November 22nd, 2003. He scored 10 goals in his first senior season. It was the first time in German soccer history that an 18–year–old scored 10 goals within his first 19 games.
Due to 2 good seasons for köln and a fantastic World Cup, where he became Best Young Player of the tournament, German record champion Bayern Munich signed Podolski in the summer of 2006. Bayern Munich paid about $11 million for Podolski.

Bayern Munich

Podolski signed a four–year contract. But he never really arrived in Munich. He scored 4 goals in his first season—not enough for a German national team striker. Podolski was also struggling in the following season.
Even when Bayern Munich signed new coach Jürgen Klinsmann, he was unable to show his real potential. He just wanted to go home, playing for FC köln again, where everyone loved him.
In the summer of 2006 his dream came true and he moved back to FC köln.

FC köln and FC Arsenal

Lukas PodolskiLukas Podolski signed a new four-year contract when he got to Köln. The whole city celebrated when the transfer was announced because their hero was back. he continued struggling with his form, though. He scored 3 goals in the first season after his return and was discharged as captain. This decision was probably the best thing that could could have happened to him. He was Köln's best scorer in the following 2 years, and several European teams showed their interest in him. Köln lost the final game of the 2011/2012 season. This meant that they'd play in the second Bundesliga next season. Because of that Podolski decided to leave Köln once again and sign a contract with the English giant, Arsenal FC. Lukas made his Premier League debut on August 18th, 2012 in a game against Sunderland and scored his first goal for Arsenal 3 weeks later against Liverpool.
Senin, 28 April 2014

How to Make an Aquarium

1. Glass Type & Thickness - I used standard 1/4" (6mm) thick "plate" glass, also known as "sheet" or "annealed" glass. You will want to ask the glass shop to sand or grind the edges so it will not cut you. DO NOT USE tempered glass. If any amount of damage occurs to the glass, you won't have a tiny leak, you'll have an explosion of tiny pieces of glass all over. I chose 1/4" thick glass as my aquarium was only 14" tall. Aquariums (for holding water) that are taller than 14" will need to be made with 3/8" thick glass. The reason behind this is because water is very heavy. (A gallon of water weighs approximately 10 pounds.) If you are going to use the aquarium to house reptiles, 1/4" will be fine for up to 20" tall, possibly even 2 feet. It just depends on how sturdy you want the tank. Keep in mind that although thicker glass will make a taller aquarium sturdy, but also extremely heavy.
2. Silicone - There is much controversy out there regarding the type of silicone to use. Most websites say to ONLY use "aquarium silicone sealant." What a lot of people don't know is that "aquarium sealant" is exactly the same as regular household silicone - without the anti-mildew chemicals added to it, and silicone marketed for aquarium use is a lot more expensive. Anti-mildew chemicals slowly release toxins over time. These are toxic to fresh and salt water fish, and it's most likely not good for our reptiles either. There are a few brands of silicone that do not include the anti-mildew chemicals. They are: GE Door & Window clear silicone (which I chose to use because I could find it at Lowes), Dow-Corning "DAP", and NAPA All-Glass 100% clear silicone (yes the auto parts store, and its part # 765-1336). Just make sure that whatever silicone you decide to use - read the label. Make sure it doesn't say that it prevents mold and mildew. And don't be alarmed if there is a disclaimer on the tube that says its not for aquarium use. They have to say that so they won't be held liable if your aquarium breaks or doesn't seal properly. And it will make your job so much easier if you get the kind of tube that you can put in a caulking gun.
3. Materials Needed - Plate glass with the edges sanded, 100% silicone sealant, masking or duct tape, caulking gun, and a few large containers or heavy objects for holding up the glass.
4. Cost - The square aquarium I built was 14" square. I needed 5 pieces of 1/4" plate glass ($6 each), 1 tube of silicone ($3), caulking gun (I already had), and masking tape (already had). Total cost: $ 33.00.


Photo #1

Photo #2


Photo #3


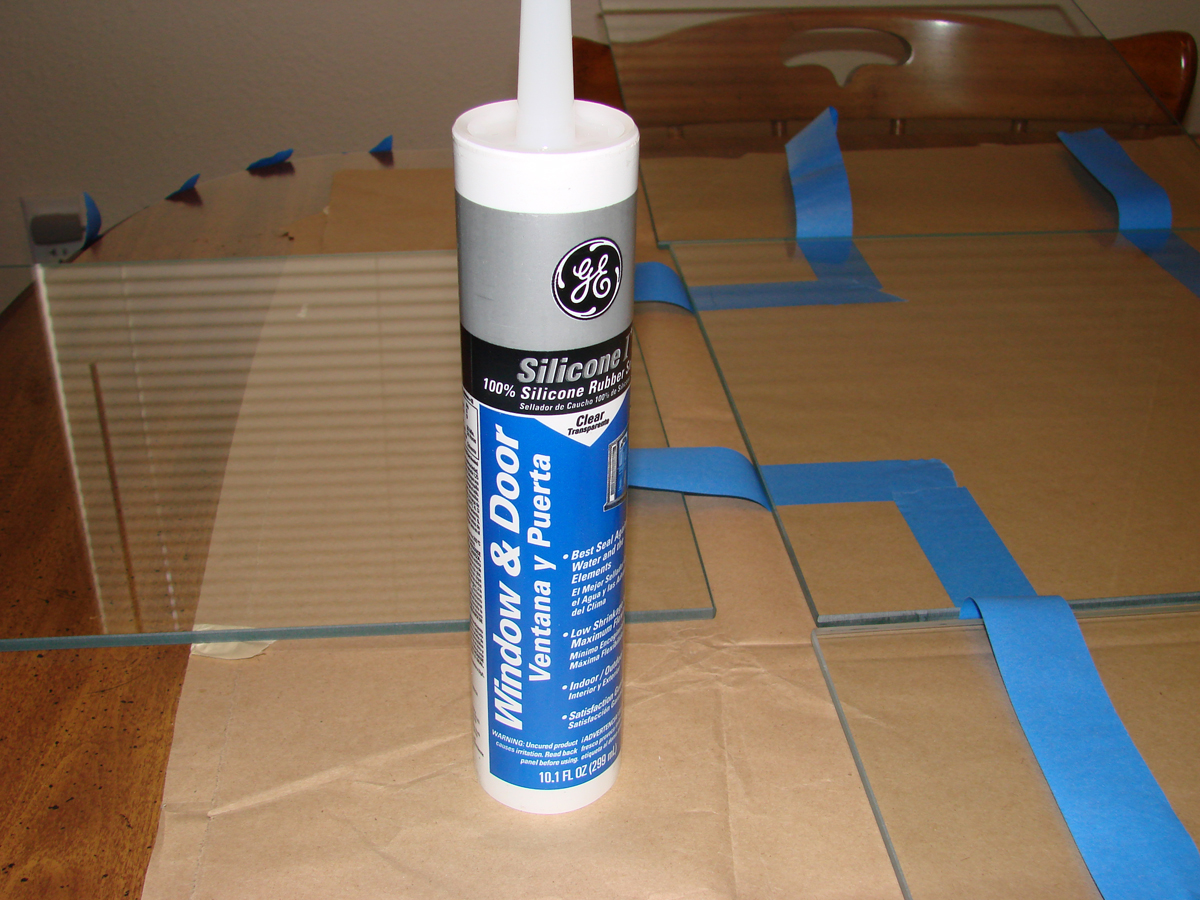
In the 1st photo you can see the sanded/ground edges of the 1/4" plate glass. This is not a bad idea, and it may cost a little bit more to have done, but it's very easy to cut your fingers with as much as you will be handing the glass. Photo #2 is the GE Window and Door silicone that I used, and photo #3 shows how I laid all 5 pieces of glass out to get them ready to assemble and had strips of masking tape ready for use (see below for instructions).
5. Order of Assembly - The order of construction should start with the bottom pane, then put the front pane on, then the 2 side panes, then the back. Doesn't sound so easy does it? I promise once you get started, it won't seem so bad. The side pieces will need to be shorter so they can be sandwiched between the front and back pieces. For my tank, the front, back and bottom pieces were all 14" x 14". But the 2 side pieces were 14" x 13 1/2". If you use a different thickness of glass, you'll have to compensate in your measurements of the side pieces.
6. Installation - If you're not used to a caulk gun, you might want to practice making even lines on something other than your glass, like newspaper or cardboard. You'll need the silicone line to be straight and about 3mm in thickness. When you cut the top of your silicone tube, make sure it's got about a 3mm opening. If you have all your pieces laid out before hand, it will be a lot easier. I put the aquarium together by myself, but if you have someone to help that makes it a little easier, especially for larger aquariums.
Step 1 - With all your glass laid out (double check that the shorter pieces are your side pieces) clean all of the edges with acetone or alcohol. Then cut strips of masking tape and stick half of each strip to the underside of the bottom pane and leave the other half of the strip laying on the table (see photo #3). As you install each side, you'll pull the tape up and stick it to the glass. You won't want to have to lift the aquarium up after you've started siliconing the sides - that would get messy! Then cut 16 strips of tape and place them nearby, within easy reach.
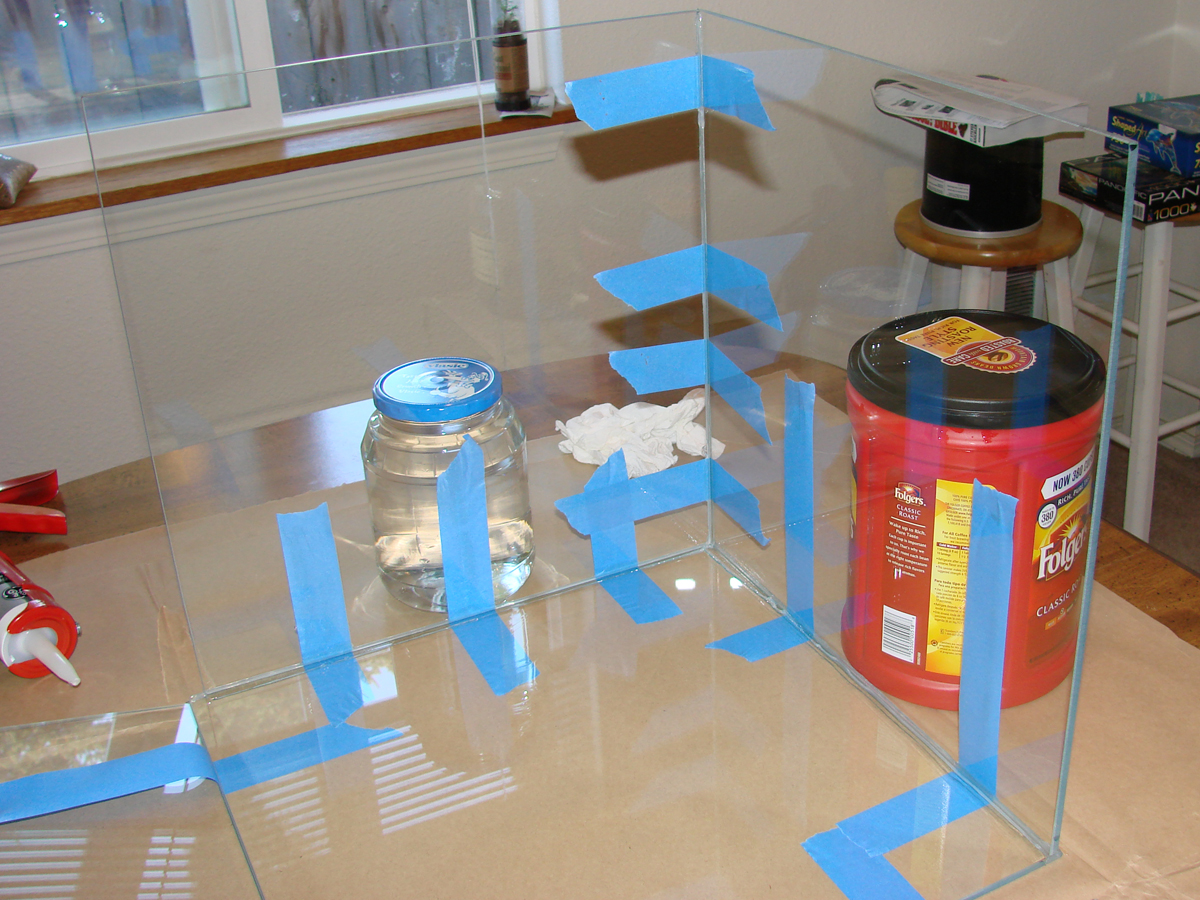
Apply a thin (3 mm) and continuous strip of silicone along the top of the bottom piece, about 2mm away from the edge. Then place the front piece into place, press it down firmly, but gently into place. Do not wipe off the excess silicone, you can trim or cut it after it has fully cured. The front glass pane should stand up on its own now, but if it doesn't, or if you are afraid you might bump it, you can prop a container (filled with water), or other heavy object, up next to the upright pane of glass for additional support. I thought I would need this, but in the end I really didn't. But it's good to have this on hand just in case (see photo #4).
Click here for a silicone diagram (PDF format). The pink lines represent where the lines of silicone are placed, and the pink #'s are the order in which I describe in the installation process.
Note: Do not build an aquarium in humid or cold conditions. Tape will not stick well if it's humid, and both humidity and the cold slows down the silicone curing process.
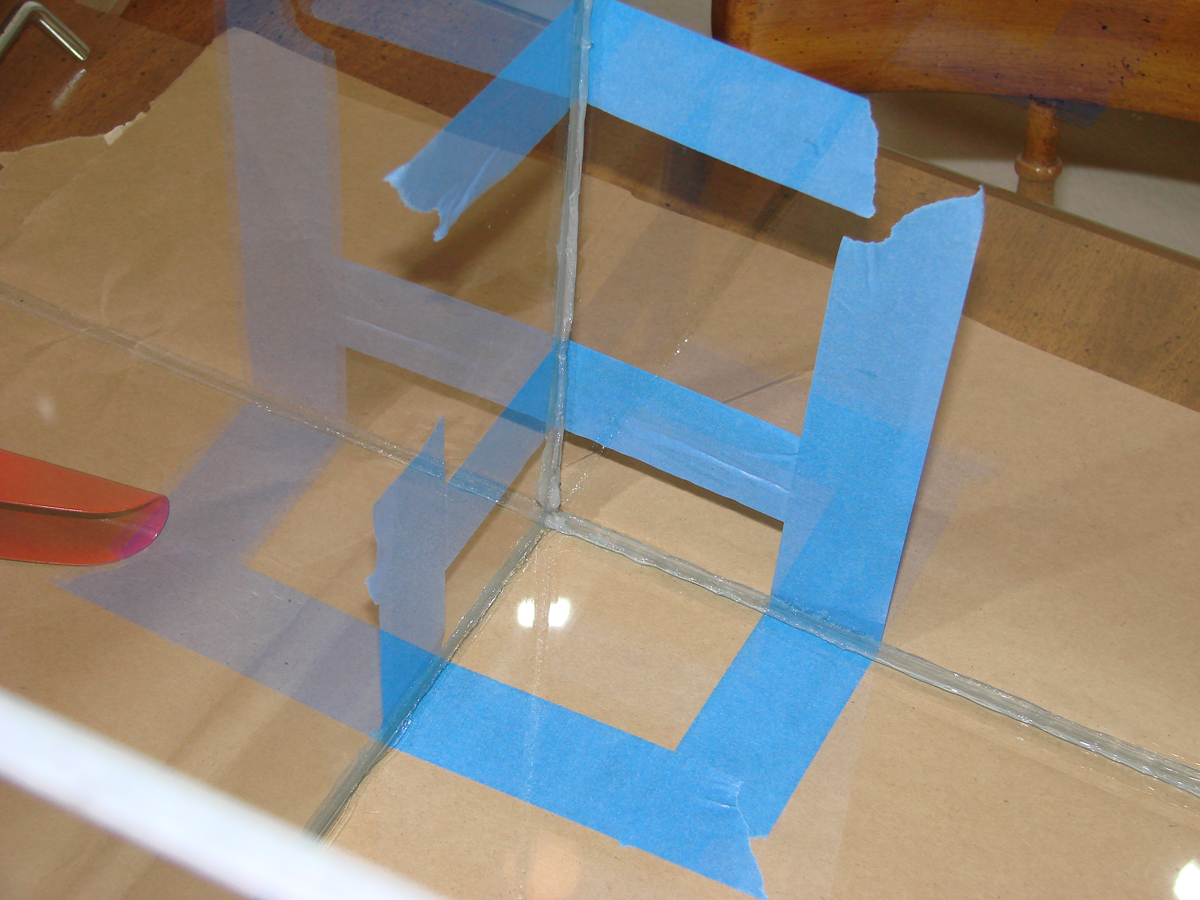
Step 2 - Run another thin line of silicone along the bottom pane, 2mm from the edge, for the side panel. And also a line of silicone (3mm wide, 2mm from the edge) along the inside edge of the front pane you just installed. Press the side panel into place, making sure to press down firmly, but gently. Try to get this piece in place the first try - get help if you need it. If you press the glass onto the silicone and then pull it off or re-align it, you could create bubbles in the silicone, which can create a faulty seal later on. The front and side panel should form a tight corner that is properly aligned (see photos 5 and 6).
Step 3 - Run another thin line of silicone along the bottom pane, 2mm from the edge, for the second side panel. And also a line of silicone (3mm wide, 2mm from the edge) along the inside edge of the front pane. Press the second side panel into place, making sure to press down firmly, but gently.
Step 4 - You will need to run the last 3 thin lines of silicone... along the bottom pane, and 2 along the inside edges of the back panel. Then press the back panel into place, making sure to press down firmly, but gently.


Photo #4

Photo #5


Photo #6


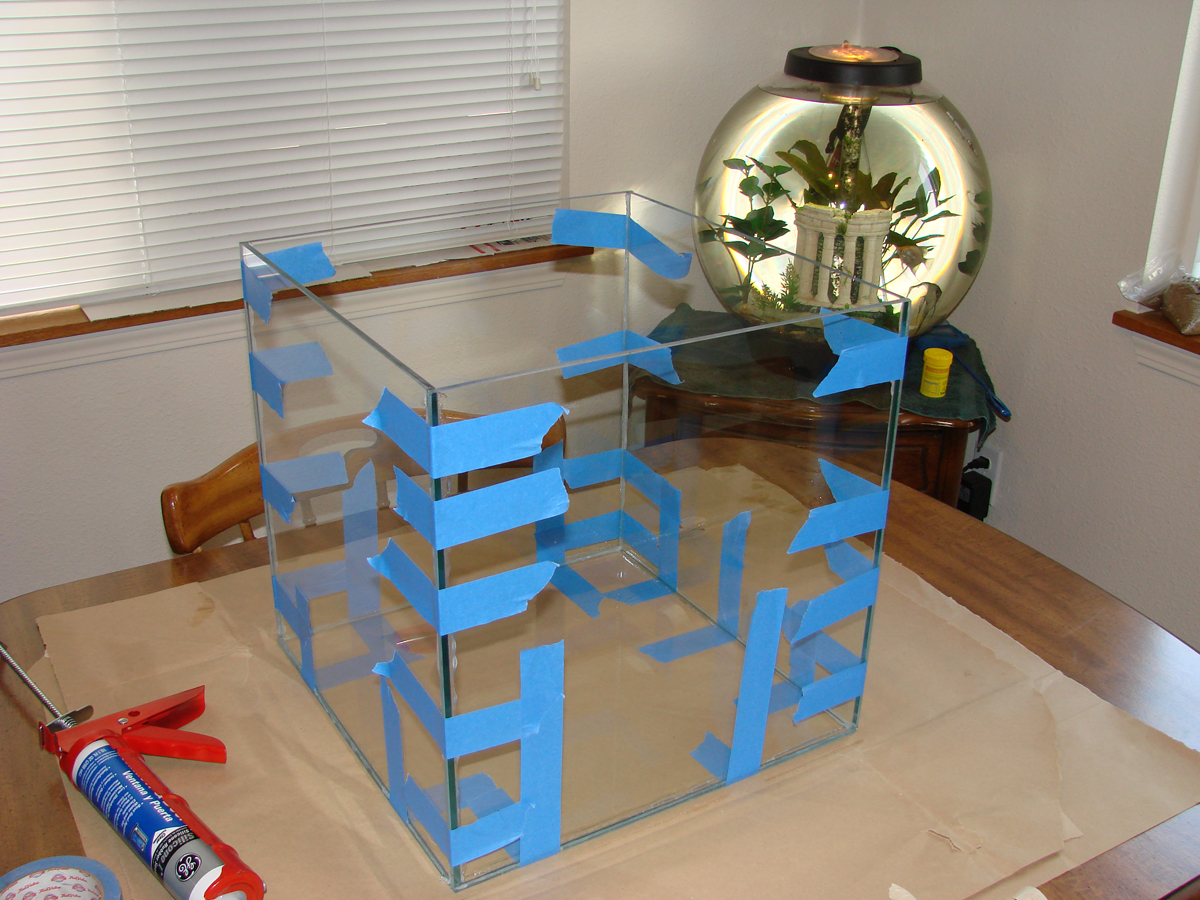
Step 5 - You're almost done! Go around to each edge and corner seam and make sure they are lined up properly. Because once the silicone starts to set up, you won't be able to move them. The silicone will be dried in 12 - 24 hours (depending on the air temp and humidity), but you should let it sit for at least 24 - 48 hours. Silicone continues to harden the longer it sits, and I highly recommend letting it sit for a full week if you intend to put water in it. See photo #7 - the finished product.


Photo #7


I will add more photos to this section as I finish the aquarium. I will be making a wood base for it also.


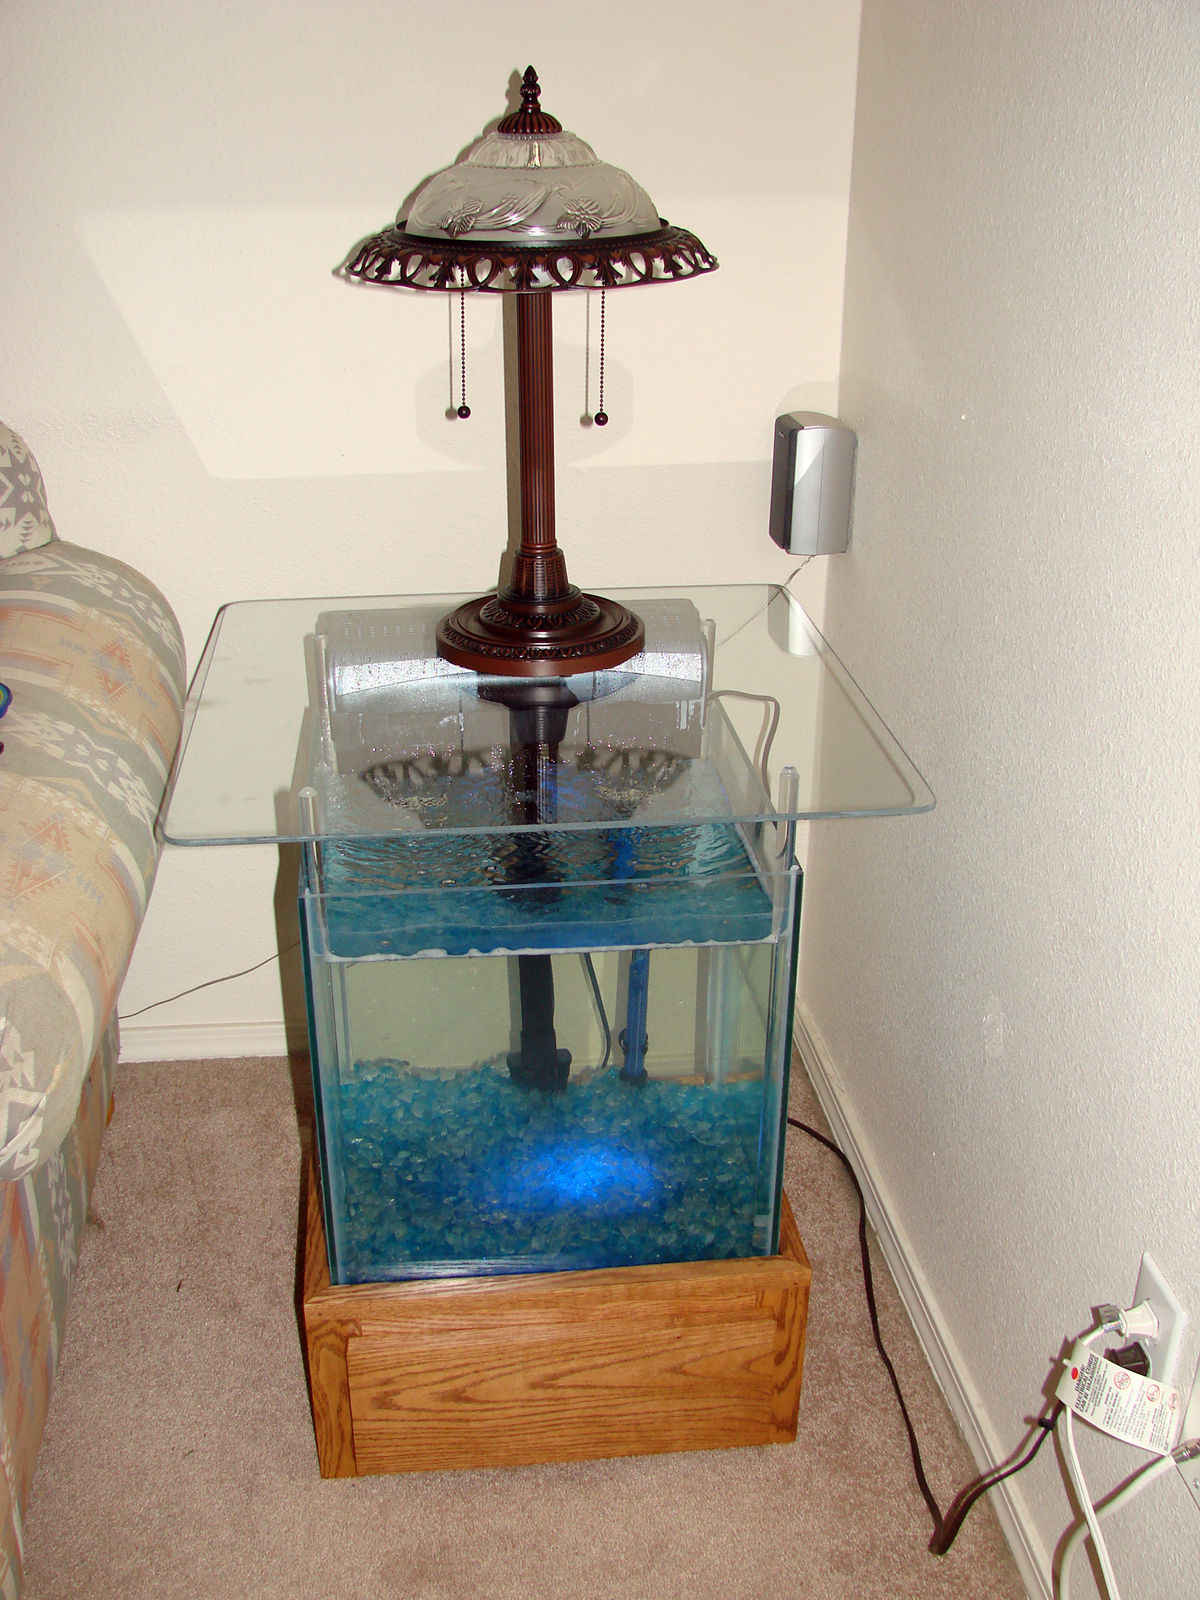
And here it is... the finished end table aquarium with a wood cabinet base and a glass top. I have also installed a color changing LED light in the base that shines up through the glass bottom and the glass rock. Looks amazing at night.

PRONOUNS


·                                Penjelasan tabel personal pronoun sebagai subject :
1. I study math (= Saya belajar matematika)
2.  You don’t have to go (= Kamu tidak harus pergi)
3. That is Mrs. Fitria. She is a smart professor. 
(Itu nyonya Fitria. Dia seorang profesor yang pintar)
·                                  Penjelasan tabel personal pronoun sebagai object:
1.      Please help me (= Mohon bantu saya)
2.      These were for you (= Ini semua untuk kamu)
3.      Mother proud of him (= Ibu bangga kepadanya)
example of pronoun:
 

1.       I really idolize Him. (= Saya sunguh-sungguh mengidolakan-Nya.)

2.     Where are you from? We are from the market. (= Kalian dari mana? Kami dari pasar)

3.       It is a wolf, isn't it? (= Itu seekor serigala, kan?)

Kamis, 27 Maret 2014

Tugas TOEFL

6. George has not completed the assignment yet, and Maria hasn’t neither.
Revise : George has not completed the assignment yet, and Maria hasn’t either.
               kata either atau neither artinya "juga",yang digunakan dalam kalimat bermakna negatif

Jumat, 24 Januari 2014

CURRICULUM VITAE


Personal Data

Full Name                   : Miftahurrahman
Gender                         : man
date of birth                 : Bima, 4 march 1992
Citizenship                  : Indonesia
Marital status               : has had no wife
High and weight          : 167 cm, 55 kg.
Religion                       : Islam
Full address                 : Jl. Raya Bogor, West Java
Telephone, HP             : 0217752484 - 081280595942
E-mail                          : Miftahurrahman@gmail.com


Education background

» Formal

1998 - 2004   :
2 elementary school Bima

2004 – 2007  : 2
Junior high school Bima

2007 - 2010   : PGRI
vocational high school Cibinong

2010 - Now   :
Even a degree program ( S-1 ) computer system, university gunadarma


» Non Formal

2012              :
Linux Networking Course Gunadarma University
2012              : Mikrotik Networking Course Gunadarma University


Potentiality
  • The ability of engineering computer ( maintenance, and informatics technicians computers, ms word, ms excel, ms power point, ms access, ms outlook, etc. ).
  • Capability of Networking,mikrotik,linux and windows.

Depok, 21 january 2014
my sincerely,

Miftahurrahman

Application Letter


Depok, 21 january 2014

Dear Mr/Mrs,
HRD Manager PT. ADI KARYA NETWORK
Jl. Lenteng Agung No. 205, Jakarta

subject : job applications
sincerely,
Based on information stamped on the print media, a newspaper world media about a vacancy in PT. ADI KARYA NETWORK. Through letters a request for this i want to apply oneself to apply for the job in the company Mr / Mrs was led to fill the gap is needed now. I they hand down here  :
Name                           : Miftahurrahman
the date of birth                       : Bima, 4 March 1992
gender                          : male
education                     : Computer System, University Gunadarma 2010
Address                       : Jl. Raya Bogor
Telephone                    : 082167845444
To furnish a few the necessary data as an ingredient of consideration Mr / Mrs company time to come, i attach also completeness data self as follows :
1. Fitting a picture.
2. The photo copy id cards.
3. A list of the acts of life.
4. The photo copy of the certificate last.
5. The photo copy the details of the value of the exam.
6. The photo copy of the certificate of competence.
7. The photo copy of the certificate the practice of field work.
8. The photo copy certificate refrensi.

So i made a request for this letter with actual and upon attention and wisdom Mr / Mrs, i say thank you.
My sincerely,

Miftahurrahman

Kamis, 12 Desember 2013

The Difficult In English Language


Learning english is a very important point because english is a language that is used as the language of international communication links between all of the language and countries around the world. One when everyone must be will have a thing where yes are required to be able to communicate with english was it for in the neighborhood he worked or in the neighborhood he lives. 

In english there are stage stage of learning which is learning the vocabulary in language,procedures of writing a sentence language ( grammar, tenses ), read, listen to and inscribe it back that language ( reading, listening, & writing ), as well as in direct conversation.

Overall i think a difficulty that i often natural in learning to speak english is on the stage of a conversation directly. Because i is still difficult to familiarize oneself to utter talks in english.